I contend that segment Triangulation will identify most of the false shared DNA segments reported from your DNA test. This includes a Match with one segment which is false; as well as a Match with multiple segments, some of which are false. I have Triangulated DNA segments at FTDNA, 23andMe, MyHeritage, and GEDmatch, and found many false segments (segments which did not Triangulate with other overlapping segments). In almost all cases these false segments are under 15cm. I cannot guarantee that all the false segments can be identified this way, but I am confident that most can. Triangulation is a time-consuming process – starting with a download of all your segments from one company at a time; sorting them by Chr and Start, and then working down the list to see which ones Triangulate. I did a blogpost using MyHeritage as an example for segment Triangulation: https://segmentology.org/2020/12/29/triangulating-your-genome/
Warnings: this takes weeks; there are some Triangulations that are difficult – just skip over these; a few might slip through the cracks; there may be some bare spots in your DNA.
Special Note: Although a Match’s segment(s) may be false, that does not mean the Match is not a cousin. This looks like a double negative, so let’s phrase it this way: a Match may be a cousin and not share any DNA segment with you, or they may share a false segment with you. In fact, about half of your true fourth cousins (4C) will not share a DNA segment with you.
Recently, at the Genetic Genealogy Tips & Techniques facebook group, there was a post looking for ways to identify Matches at MyHeritage which are random junk. Segment Triangulation would identify a lot of false segments. However, at MyHeritage, it might be efficient to just download all segments, focus on those below 15cM (where most false segments would be) and work down the list to see which Match segments don’t have a TG Icon. Still a lot of work… If anyone tries this, please post about your experience – we can learn from each other.
[22BV] Segment-ology: Identifying False Shared DNA Segments TIDBIT by Jim Bartlett 20230618
I have long been a proponent of segment Triangulation (and Triangulated Groups (TGs)) and also Shared Match Clusters. Both of these are powerful tools. Both TGs and Clusters group your DNA Matches who share the same Common Ancestor (CA) with you.
But this is just a means to an end. By themselves these groups (TGs and Clusters) do not magically name an Ancestor, they point to a specific, but unnamed, Ancestor. They are just groups of Matches. We must also use genealogy!
By analyzing the Trees of Matches in a TG or Cluster, we can often find a consensus Ancestor. This Ancestor may be a known ancestor, and the Matches’ Trees may provide additional information for our research. Alternatively, this Ancestor may be a new Ancestor for us – a bio-Ancestor, a Brick Wall Ancestor, or even a “floating” Ancestor (unknown connection to our Tree). Or perhaps a fluke, a coincidence, a curve ball from our DNA Matches. Although a fluke is possible, as you research this new “ancestor” more, it either becomes more and more probable as your Ancestor, or less and less likely. In my experience, the evidence usually starts to mount . In only one instance for me did it pretty quickly fall flat (and in that case, I found a “secondary” consensus Ancestor in the group which worked out). As usual, treat this “consensus Ancestor” as a good clue.
Another way to frame this is: TGs and Clusters are good tools – more genealogy work is needed to make them useful – to find out more about your Tree.
The point of this TIDBIT, is that forming TGs and Clusters are good processes, but they are only a means to an end. IMO, they are definitely a step in the right direction, but the research journey is not over with that step. We need to take the next, genealogy, steps of analyzing the groups to find the CA and then integrating that information into our own genealogy.
BOTTOM LINE: TGs and Clusters are a good step – analyzing these groups is an essential next step.
[22BU] Segment-ology: A Means To An End TIDBIT by Jim Bartlett 20230611
I have just updated the Outline of Segmentology. This is located in the black bar in the header of every page – just click it. The posts over the years have jumped around; the Outline tries to put the titles in some order – sort of like a Table of Contents. Each one is hyperlinked to the blogpost. This Outline provides an easy way to scan through the topics and blogposts and navigate to the ones that interest you. Don’t forget to read the comments and questions for each blogpost – they often contain additional information.
[00] Segment-ology: Segmentology Outline Updated by Jim Bartlett 20230604
Bottom Line Up Front: Filter your AncestryDNA Match list by cMs when your objective is a distant Ancestor. Also use Side and Surname filters to further reduce your Match list for review.
Most of us use the Shared cM Project to look up the Shared cMs of a DNA Match to see the possibilities of our relationship. We’ve learned that 3,500cM means a parent/child relationship; 2600 cM is a sibling; 1750cM is a small group of close relatives; 880cM is often a 1st cousin (1C), or other close relatives. And we understand that as the shared cMs get smaller, the range of possible relationships expands.
But we can use the Shared cM Project in the opposite way – what is the probable shared cM for a given relationship? We see narrower ranges for close relationships, and fairly wide ranges for more distant relationships. However, even though the range may be relatively wide for distant relationships, the average cM does shift down as the relationship gets more distant. For example, a 3C relationship would not have more than 234cM; a 7C would not share more than 57cM (and the average for a 7C is 14cM).
Suppose we are focused on a particular Ancestor in our Tree. Our Target could be a brick-wall Ancestor; or a potential NPE (Not the Parent Expected) Ancestor; or a suspicious Ancestor; a known Ancestor for whom we’d like to find a new cousin who has some in-depth knowledge of that family; etc. We can use the Shared cM Project to narrow down our search! This works for close relationships as well as distant ones – my focus here is on the distant ones, but the process is what is important.
A good site to use the Shared cM Project is at DNAPainter: https://dnapainter.com/tools/sharedcmv4 – this site provides a number of interactive tools along with the basic Shared cM chart. For example, a 5C relationship (back to a 4xG grandparent – we have 64 of them) would average 25cM – and 50% of them would be in the under-20cM range. In this case we might want to start with the 50% in the over-20cM range. But for a 6C relationship (for 128 of our Ancestors) the average is 18cM and 70% of the Matches will be in the under 20cM range. Each of us gets to pick our own objectives and projects to pursue. If yours is like many of mine and beyond the 5C range, working within a range of cMs may be helpful.
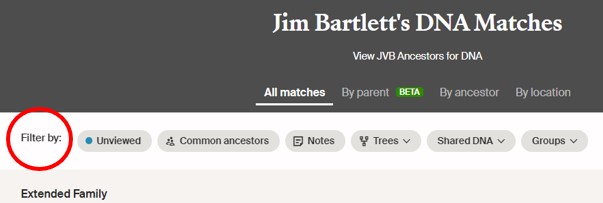
Here’s how. At AncestryDNA, open up your list of Matches, and look at the row of “Filtered by:” tabs – we can use many of these in combination.
For this example I’m going to use the Shared DNA tab to select a range of cMs, AND the Groups tab to select my Maternal side.
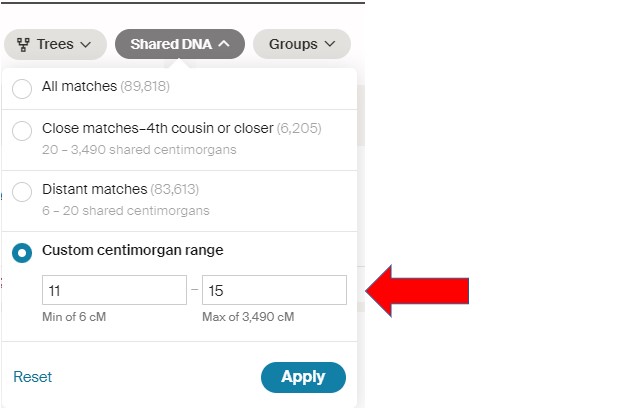
In the project I’m working on, I’ve already looked at the Matches down to 16cM. By selecting a range for the next search, I also speed up the time for AncestryDNA to produce my filtered list of DNA Matches. In this case I’ll be looking at 11cM to 15cM. Remember to Click on Apply!
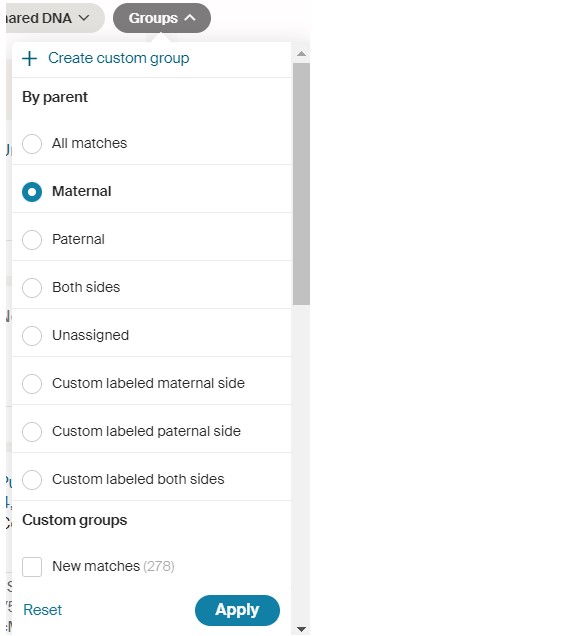
I’ll also filter my list by using the Groups tab to restrict the list to only Maternal-side DNA Matches:
In this case, I’ve chosen the Maternal side (remember to click on Apply). This will filter out a lot of Matches that don’t really apply to my Target Ancestor [I can later select the “Unassigned” Group to check those, too.] Note that you can ALSO select several categories under Custom groups – such as New Matches (especially helpful if you want to revisit this project at a later date to check on new Matches), and/or any of your “dotted” Match categories (not much help in my current project because I’ve already visited – and dotted – all of those Matches I could determine, and I’m looking for new ones now in the under-20cM range.) In some projects, this “dotted” filter may be valuable.
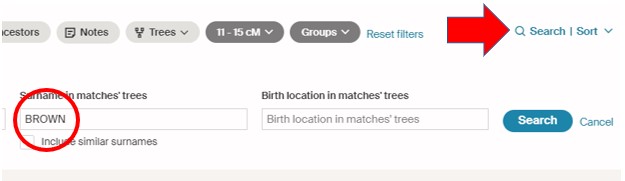
And there is one more filter I often use. For my current project, I am looking for my DNA Matches who have a BROWN Ancestor. So, I click on the “Search” tab, which brings down a row of options. I type BROWN into the “Surname in matches’ trees” search box:
You can decide to check the “Include similar surnames” box, or not. For this project, I got plenty of results with just BROWN, and, if I wanted to, I could go back and try BROWNE or BRAUN, etc. I’ve had mixed results with the “Birth location in matches’ trees” filter box – sometimes the result is either the surname or the location, and I’d be wanting both. I did have very good results on a project with HIGGINBOTHAM surname and Amherst County, Virginia location. You might need to try some combinations to see which works the best for your project. Remember to click on the blue, highlighted Search box to include this filter.
This process of filtering is a powerful way to shorten your list of DNA Matches, tailoring them to your project goals. The addition of a cM range has helped me focus on more distant Ancestors and to speed up the AncestryDNA listing algorithm.
BOTTOM LINE: When you are searching for DNA Matches, think about the best way to combine the filters (including a cM range) and search parameters at AncestryDNA.
[22BT] Segment-ology: Using the Shared cM Project in Reverse TIDBIT by Jim Bartlett 20230601